A billing schedule is a template that defines a recurring charge for student accounts. You define the charge once — what to post, how much, how often, and over what window — and once the schedule is created and assigned, the system generates and posts individual charges on its own. Use a billing schedule for monthly rent installments, weekly parking fees, payment plans, or any charge that repeats on a fixed cadence.
Creating a schedule differs from adding a one-time fee. A fee or transaction posts a single charge, while a schedule continues to generate and post charges automatically after the initial setup. If you only need a single charge, use the fee or transaction tools instead.
Before you begin
Decide which accounting mechanism the schedule needs and confirm its supporting configuration exists before you open the create form:
If you plan to use Transaction (Ledger Charge), a Charge Code must exist in your finance settings.
If you plan to use Fee Payment (Payment Gateway), a Fee Type must be available, and your school's third-party payment processor integration must be in place. This integration is typically configured during onboarding — if you're not sure whether your school has it, contact Housing Cloud Support before creating Fee Payment schedules.
Know the Start Date, Frequency, and Number of Occurrences the schedule should cover.
If you need to configure Charge Codes or Fee Types first, see PLS-6H: Finance & Fees Configuration.
Open the create form
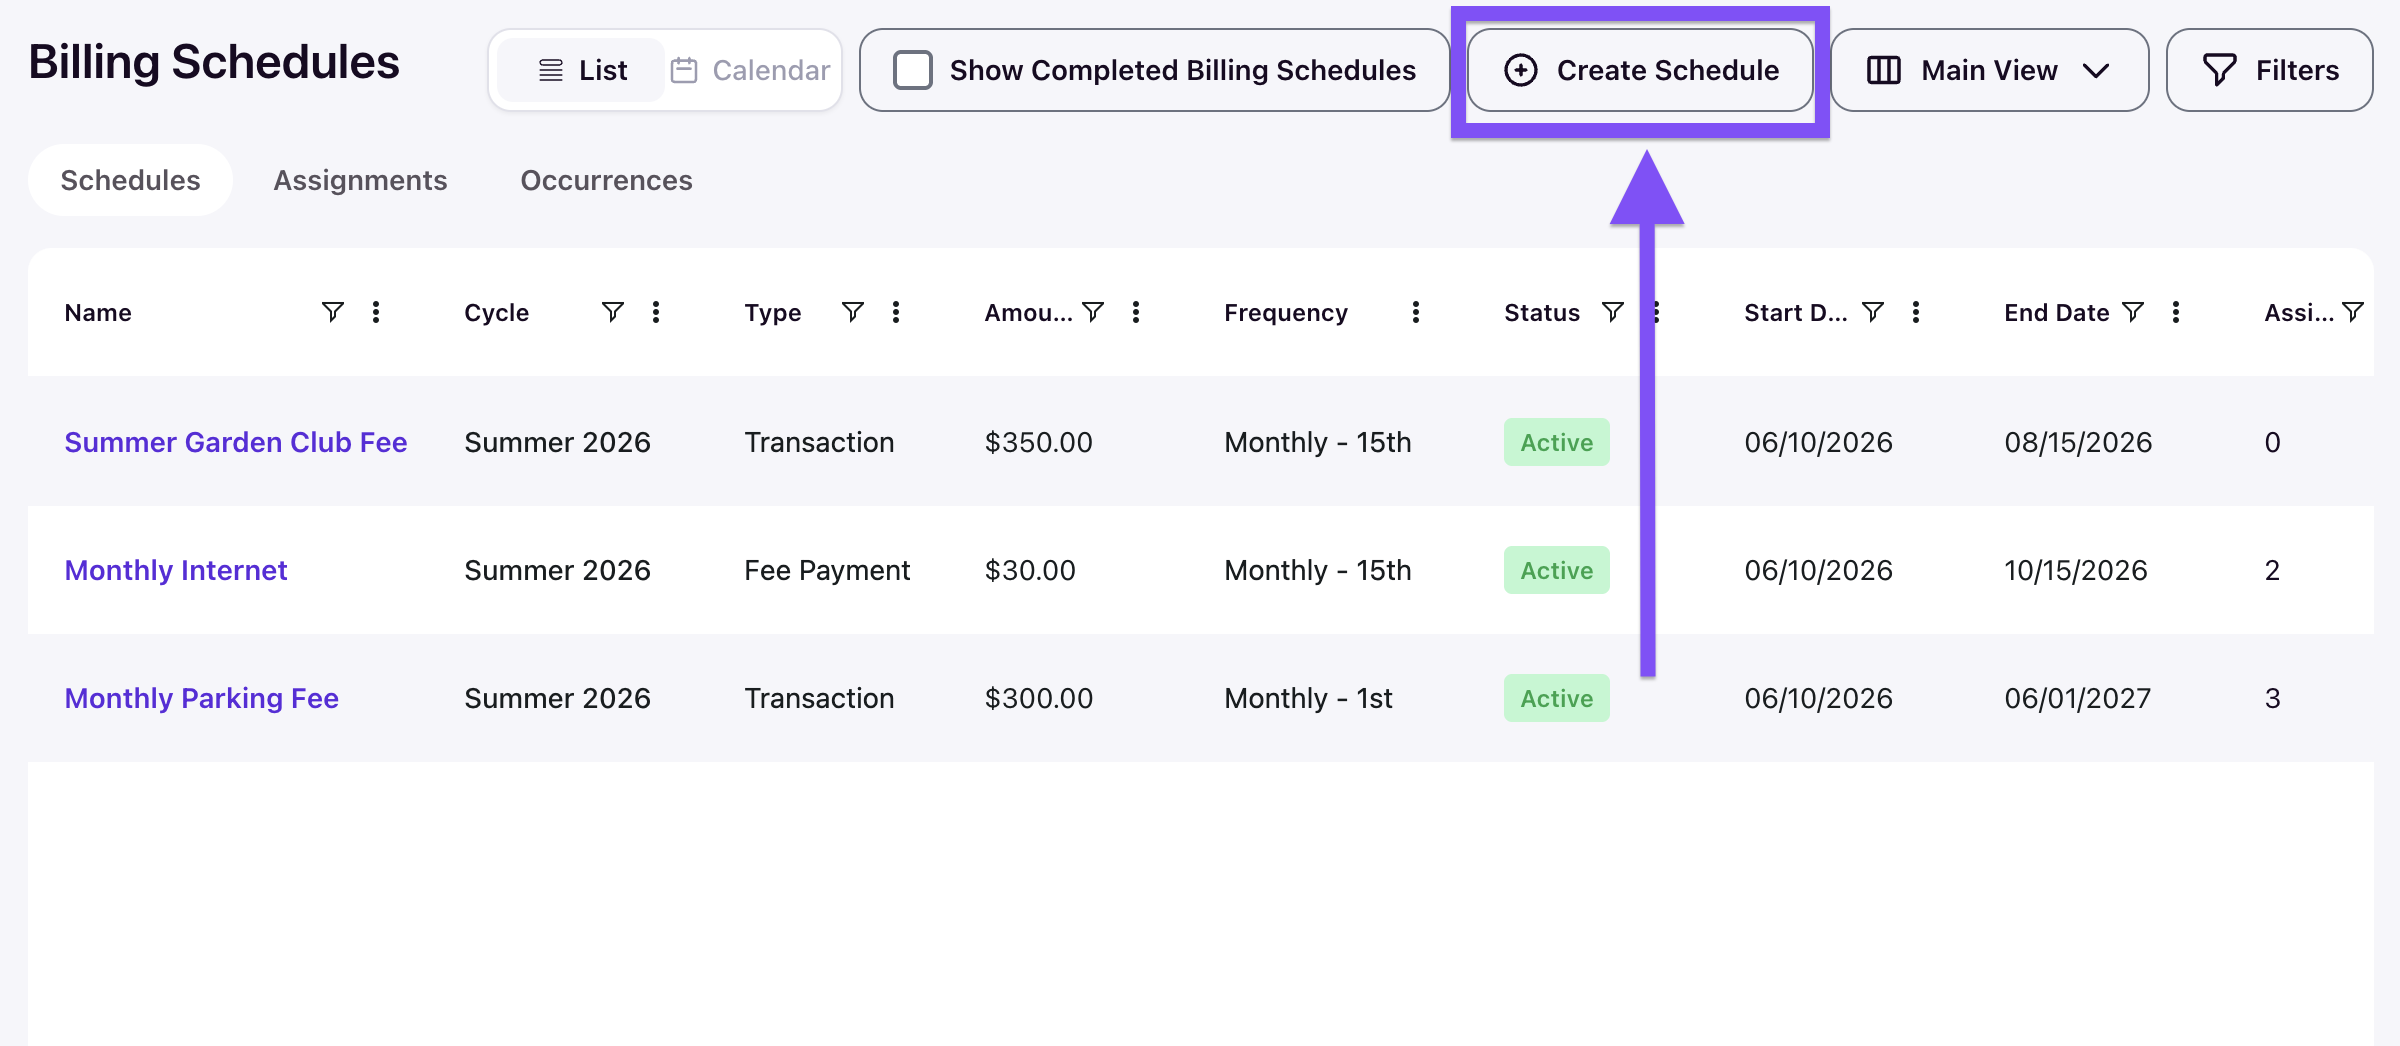
Navigate to the Billing Schedules tab and click Create Schedule.
Configure the schedule
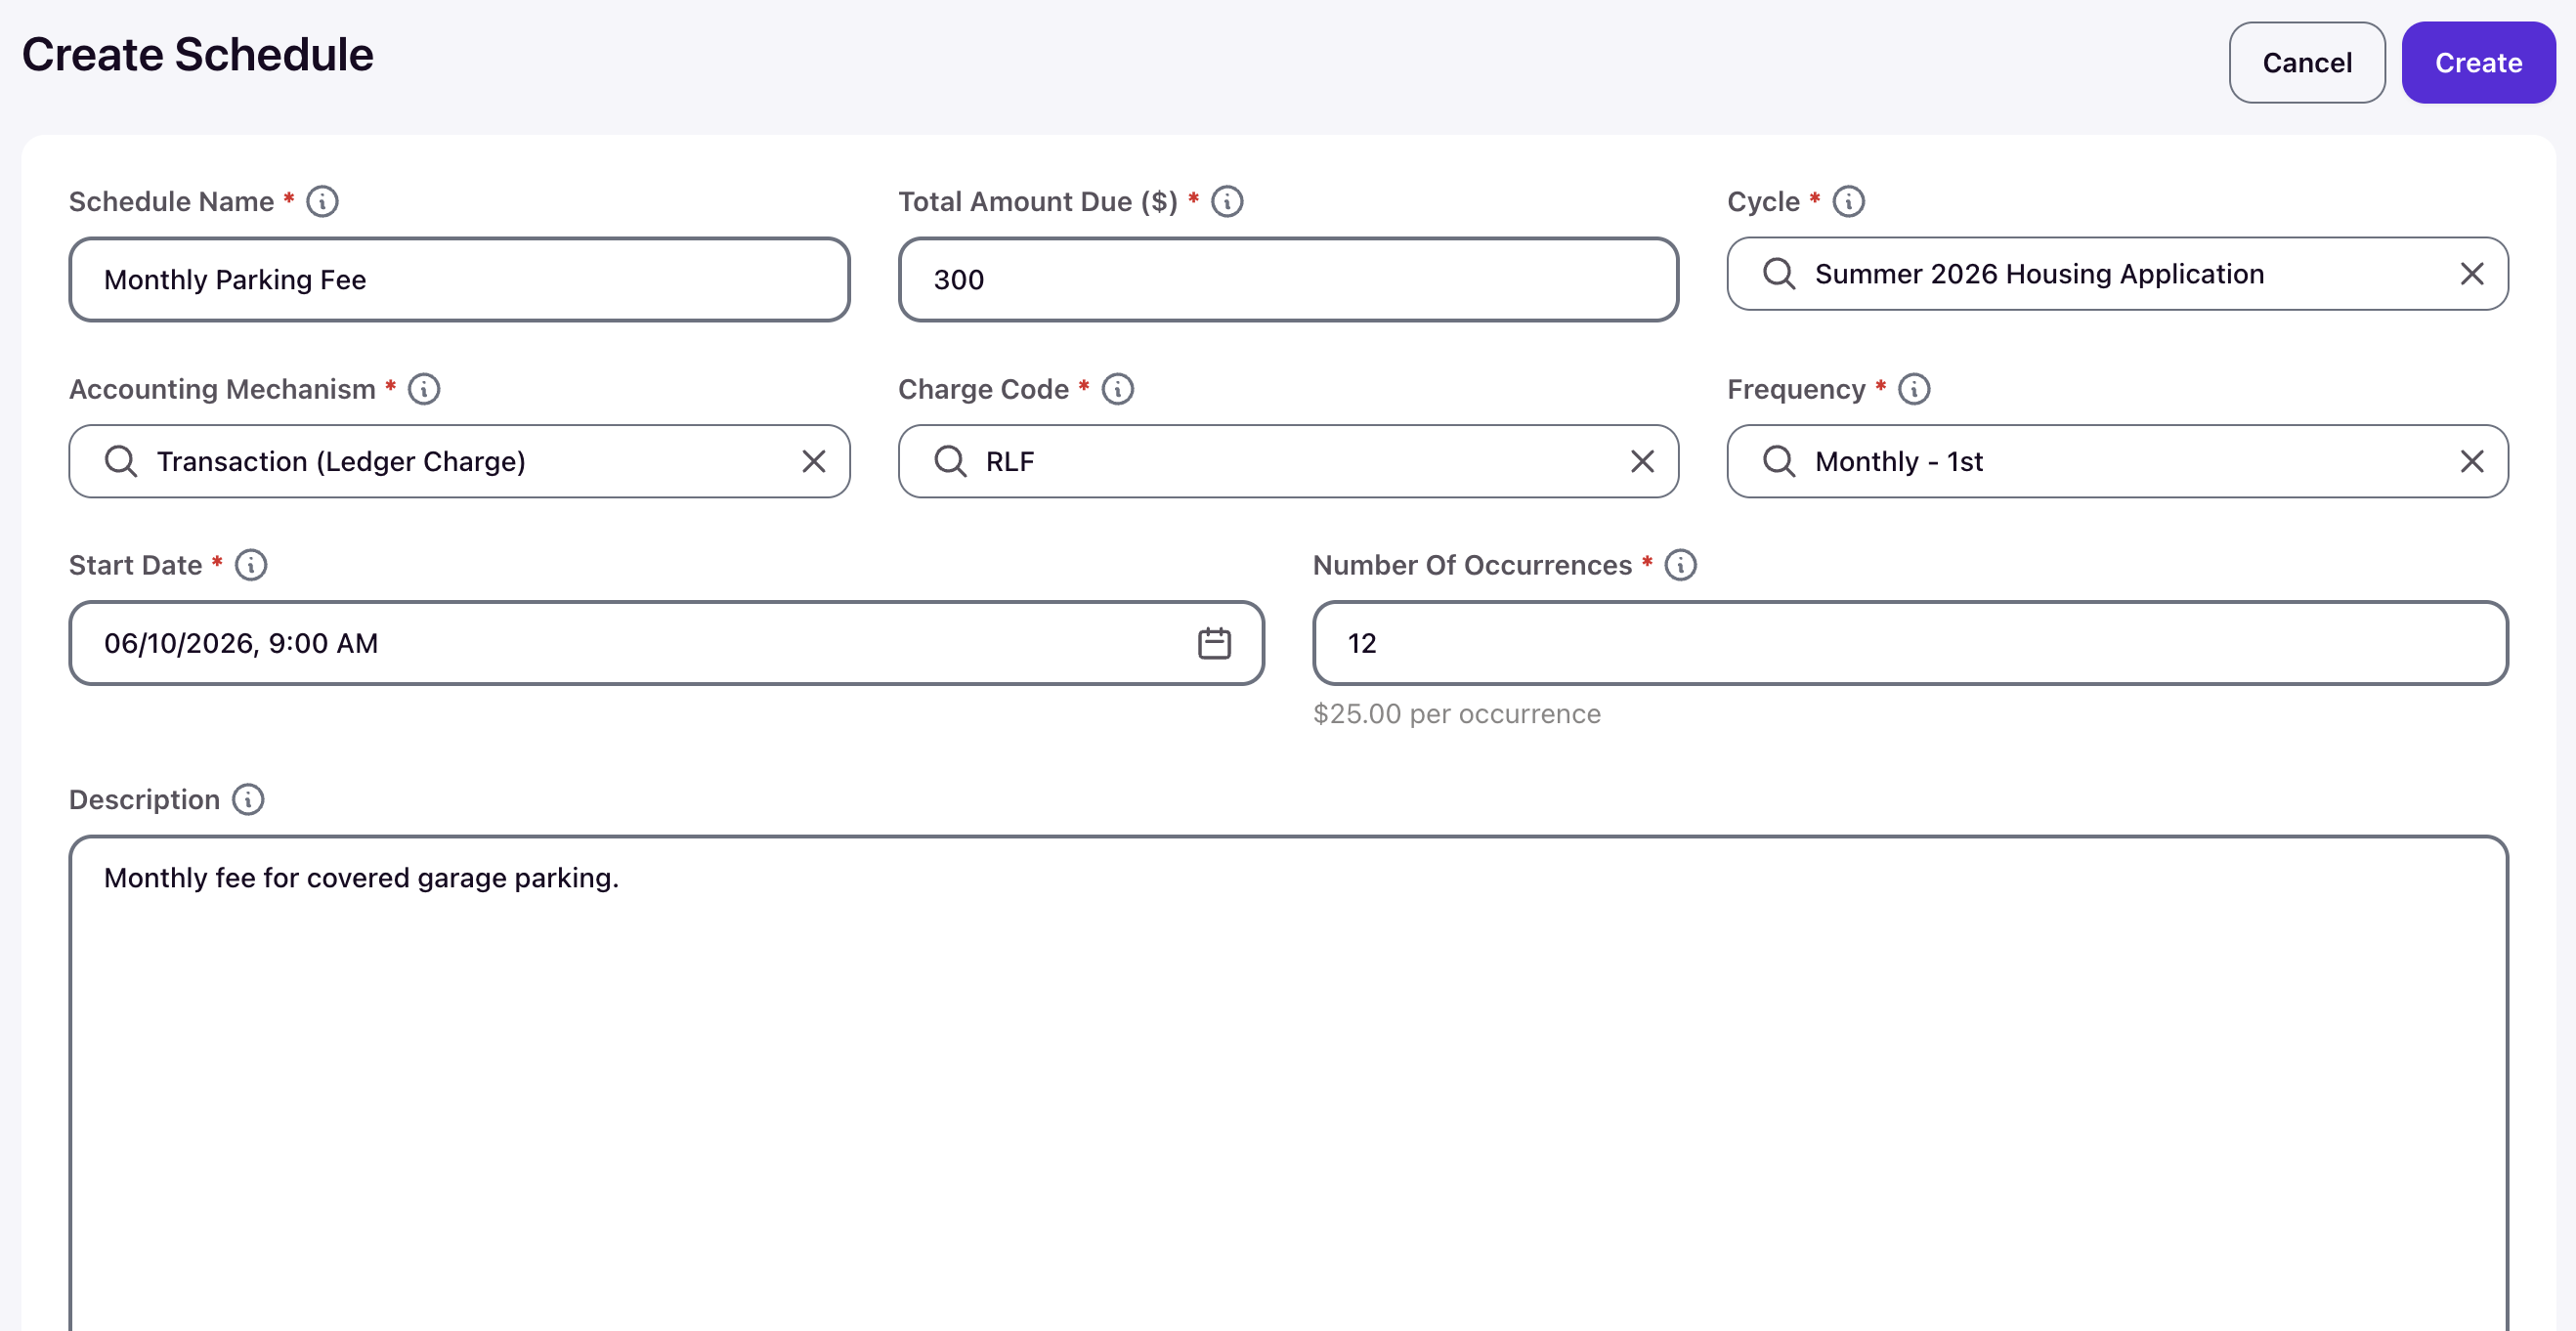
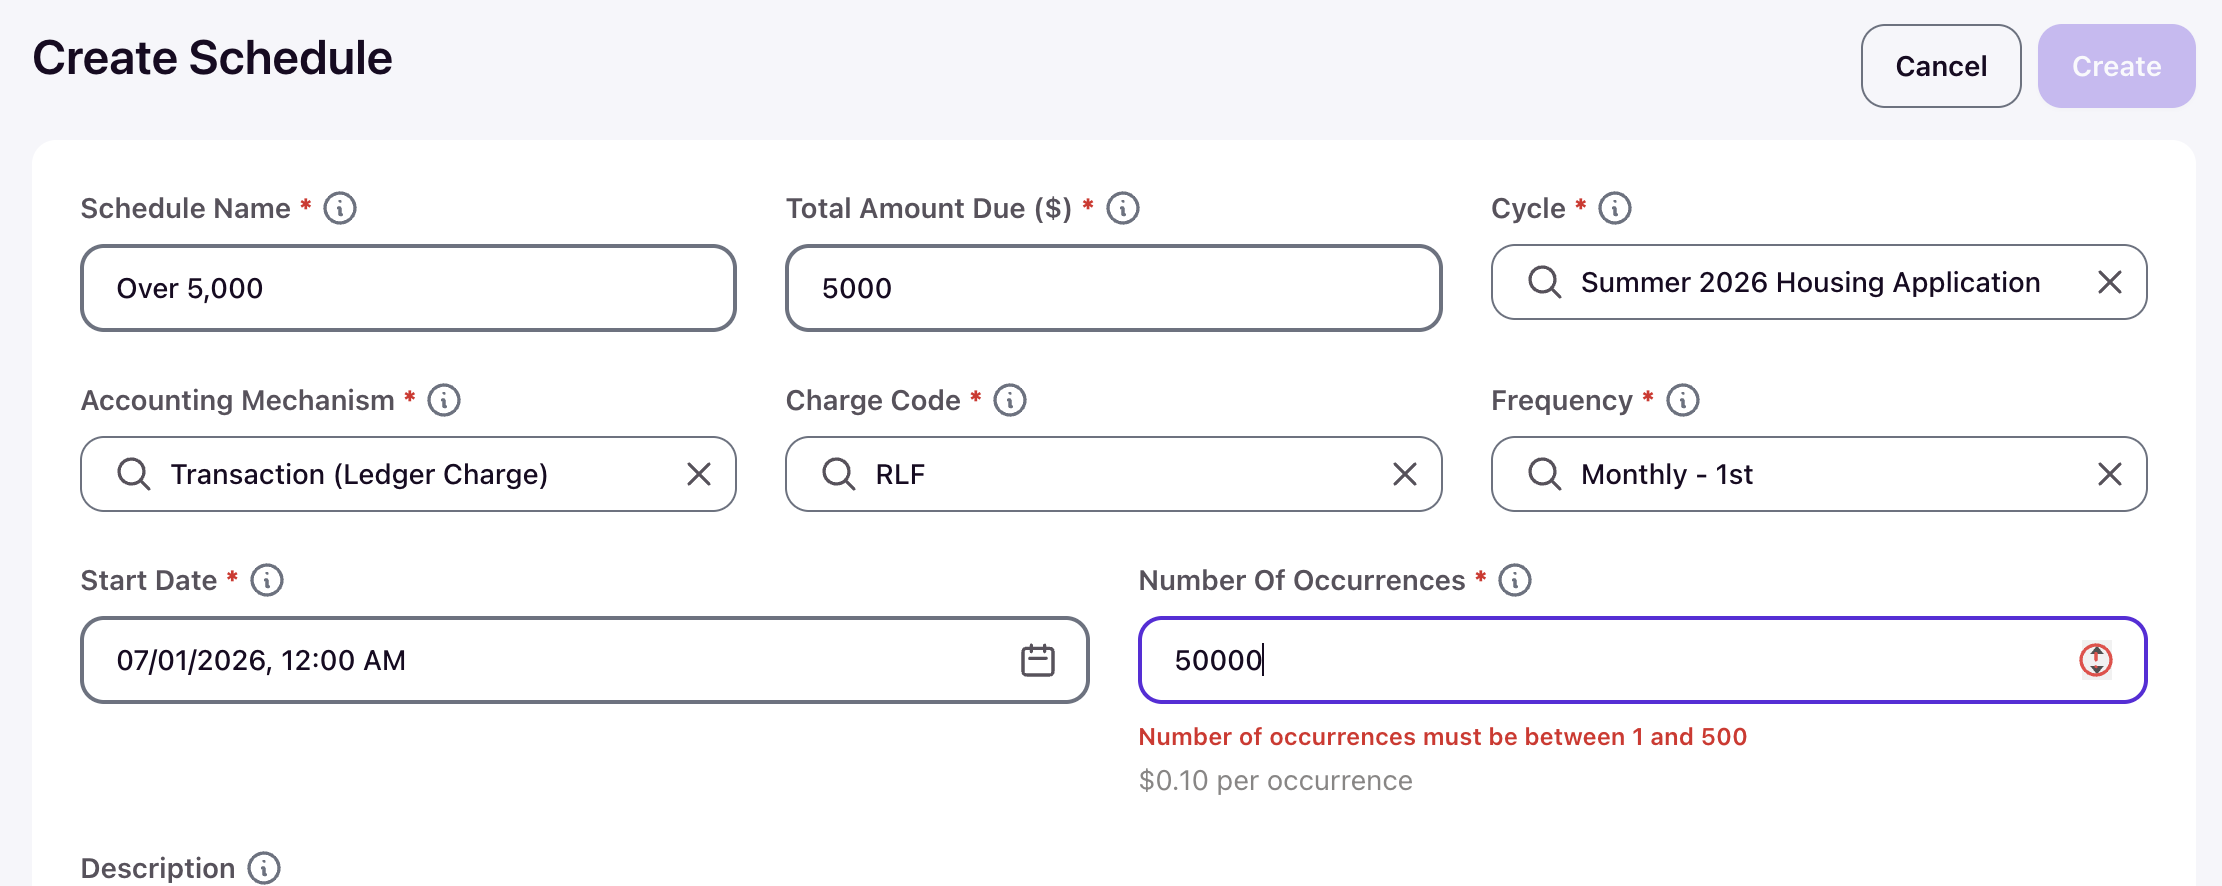
The form opens with fields for the schedule name, amount, cycle, accounting mechanism, charge code, frequency, start date, occurrences, and description.
Name the schedule
Enter a descriptive Schedule Name that your team can recognize later, such as "Fall 2025 Monthly Rent" or "Monthly Parking Fee."
Enter the total amount
Enter the full amount the schedule should bill in the Total Amount Due ($) field. This is the total across all occurrences, not the per-charge amount — the system divides it evenly and shows the result beneath the Number Of Occurrences field (for example, $300 over 12 occurrences displays "$25.00 per occurrence").
Associate with a cycle
Select the Cycle this billing schedule belongs to. The system uses this to associate generated charges with the correct housing cycle.
Select the accounting mechanism
Choose the Accounting Mechanism that matches the charge you want to post:
Transaction (Ledger Charge) — posts a ledger charge. Select the associated Charge Code from the dropdown.
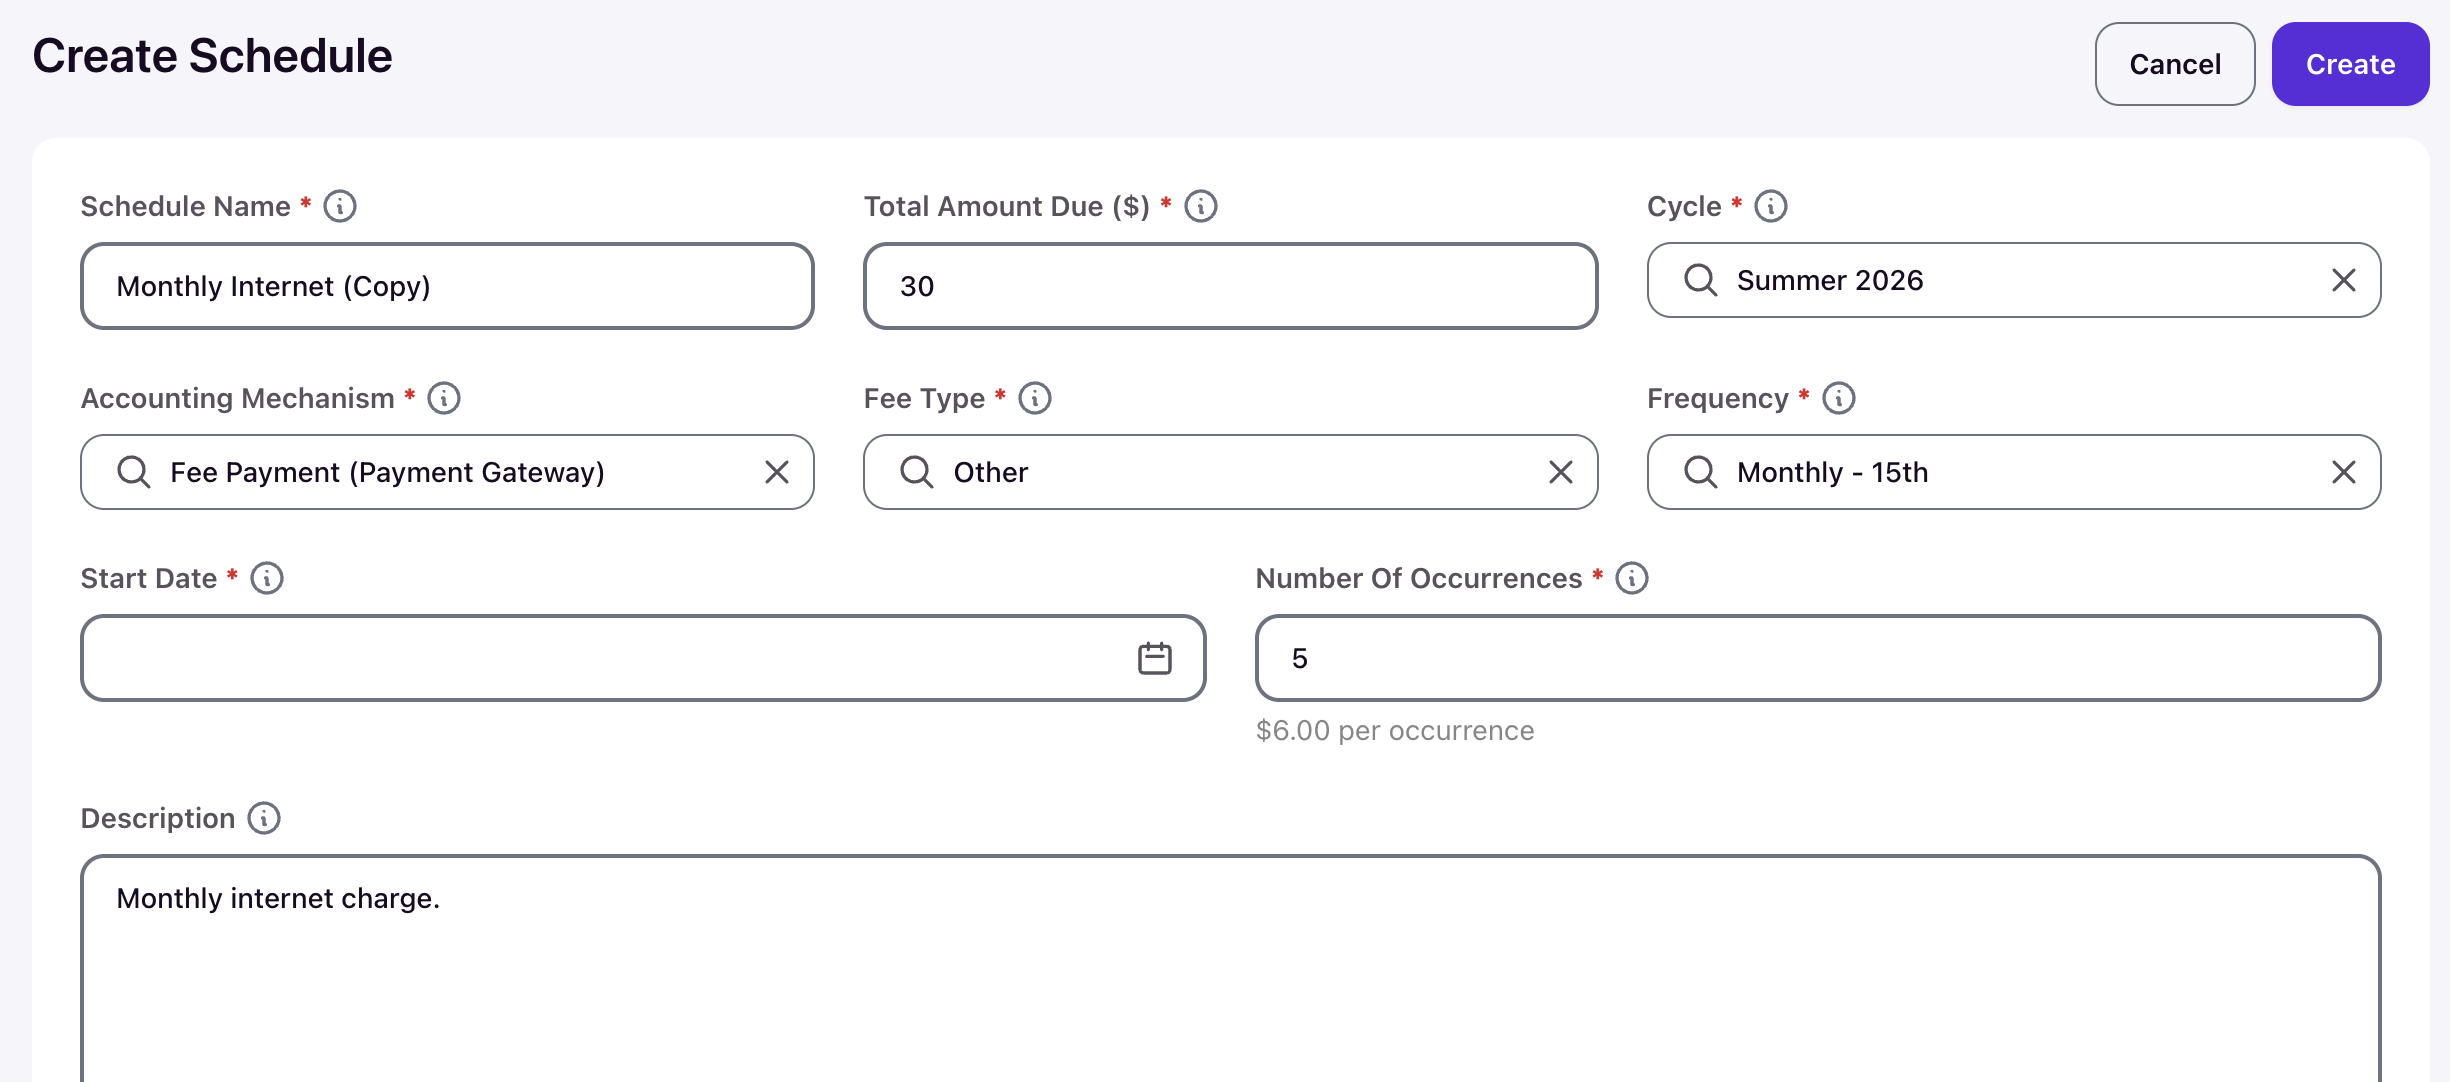
Fee Payment (Payment Gateway) — creates a fee payment. Select the Fee Type from the dropdown.
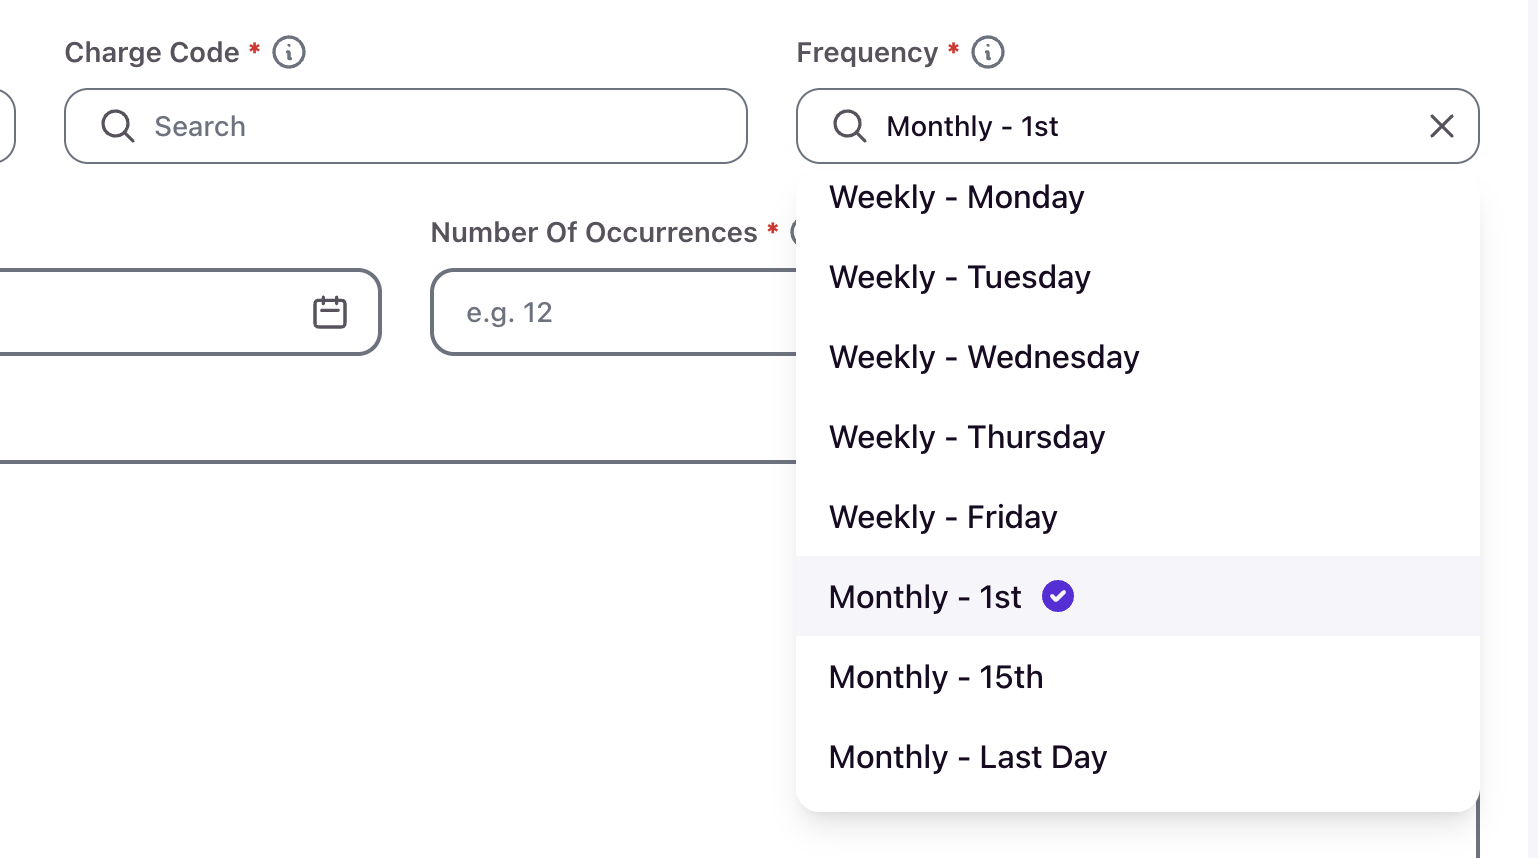
Set the frequency
Select the Frequency that controls how often the charge generates. Options are Weekly (Monday through Friday) and Monthly (1st, 15th, or Last Day).
Set the billing window
Enter the Start Date — the first date and time the system can create an occurrence (for example, 06/10/2026, 9:00 AM). The Start Date must be in the future. Then enter the Number Of Occurrences, which must be between 1 and 500. The system uses the start date and frequency to calculate the scheduled date for each occurrence and displays the resulting End Date on the schedule after creation.
Add a description (optional)
Enter a Description to record context for the schedule, such as "Monthly fee for covered garage parking." The description appears on the schedule detail page and is carried into assignments, and any generated transactions or payments.
Save the schedule
Click Create. The system validates the form, saves the schedule, and sets its status to Active.

The schedule detail page shows the total, frequency, cycle, accounting mechanism, charge code or fee type, occurrence count, start and end dates, and creator, along with a Scheduled billing assignments section where you assign residents. The schedule begins generating pending occurrences on the next daily generation run.
Copy an existing schedule
To use an existing schedule as a starting point, open it, click Actions, and select Copy Schedule. The create form opens pre-filled with the original's settings and the name suffixed "(Copy)" — adjust what you need and set a new Start Date before clicking Create.
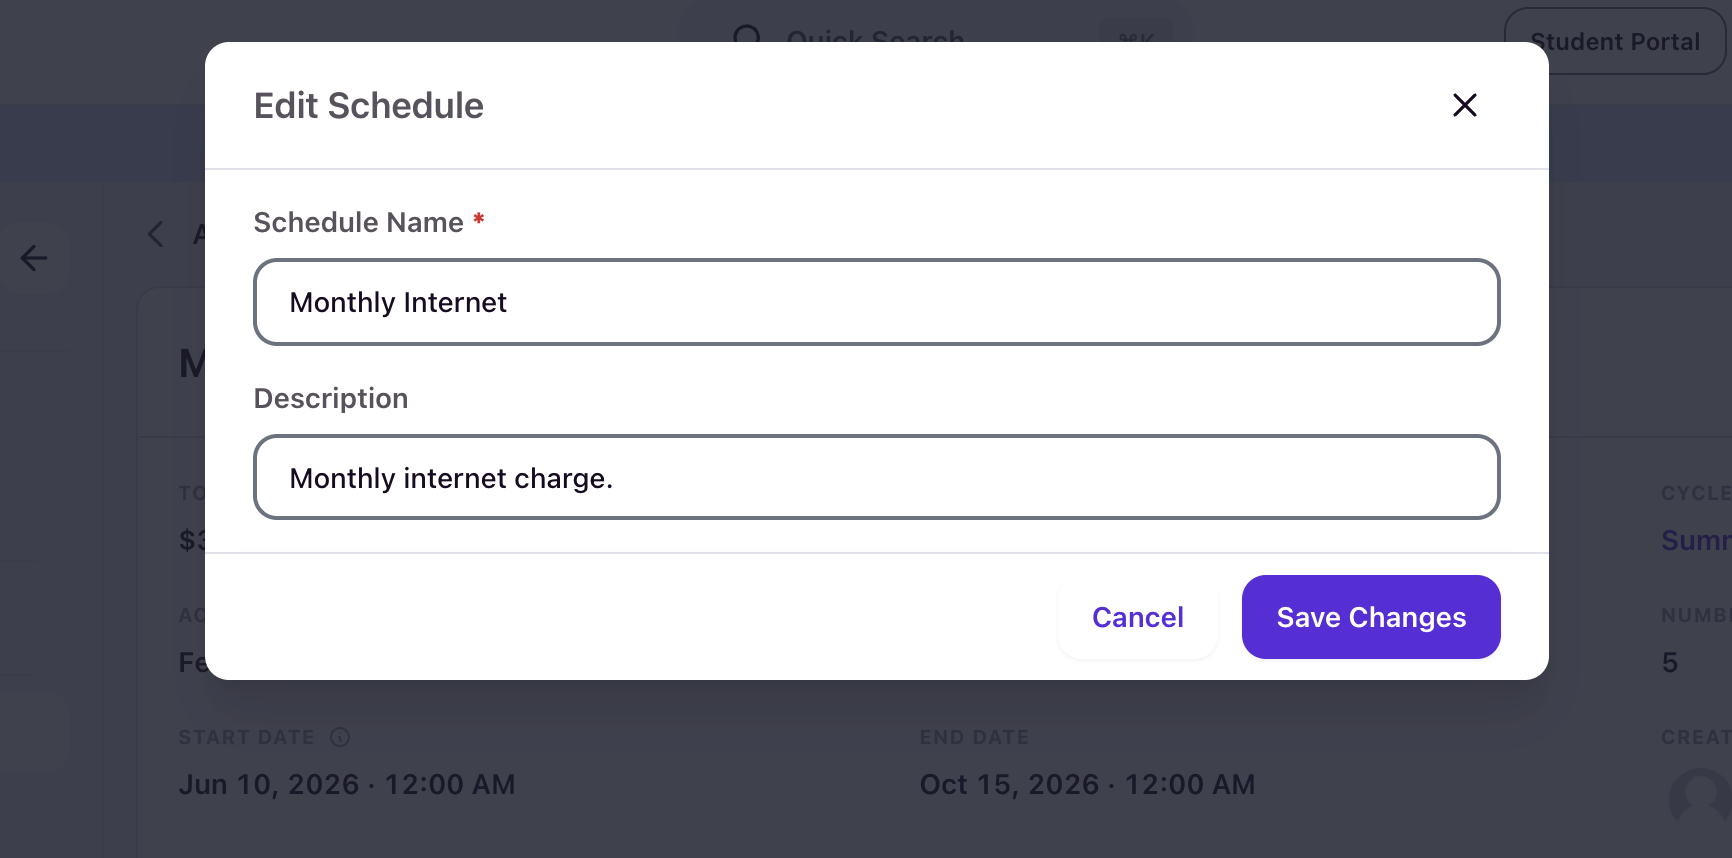
Edit an existing schedule
Open the schedule from the Billing Schedules tab, click Actions, and select Edit Schedule. Only the Schedule Name and Description can be edited — billing terms (amount, frequency, dates, occurrences) are locked once a schedule is created. If you need different billing terms, use Copy Schedule to start a corrected schedule. Ended schedules cannot be edited at all.