Overview
The navigation sidebar is how you move between different sections of the admin portal. It appears on the left side of your screen and gives you quick access to all major functional areas—from student profiles and applications to housing inventory and system setup.
What you'll learn: What sections appear in the sidebar, how to navigate between all areas of the system, and how permission-based visibility controls what you see.
Time to complete: 15-20 minutes
The Navigation Sidebar
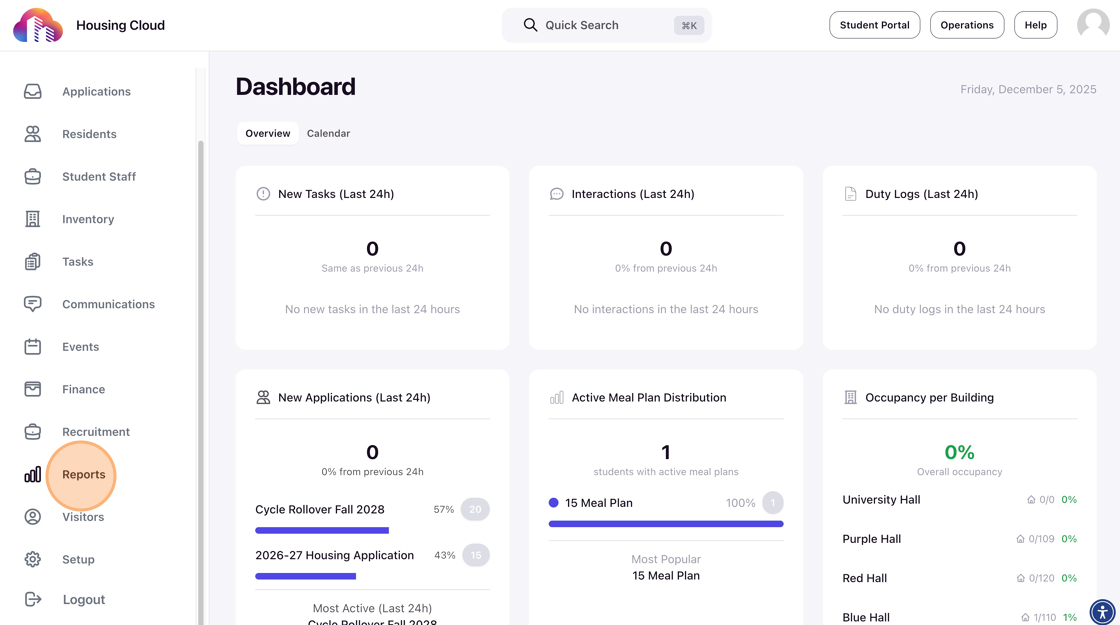
The sidebar sits on the left edge of the admin portal and contains links to all major sections. Think of it as the table of contents for the entire system—each item in the sidebar opens a different functional area.
The sidebar is organized by how you work: people-focused sections like Profiles, Applications, and Residents come first, followed by infrastructure sections like Inventory and Tasks, then system-wide tools like Communications and Reports, and finally Setup at the bottom for configuration.
The sidebar remains visible as you navigate through the system, so you can always jump to a different section without losing your place. This persistent visibility means you never have to "back out" to a home screen—you can move freely between working with students, checking inventory, and handling tasks.
Main Navigation Sections
The sidebar groups related functions together so you can find what you need quickly. Here are the sections you'll typically see, organized by what they help you do:
Working with People
- Dashboard—Your home page with occupancy metrics, upcoming events on the calendar, and shortcuts to common tasks
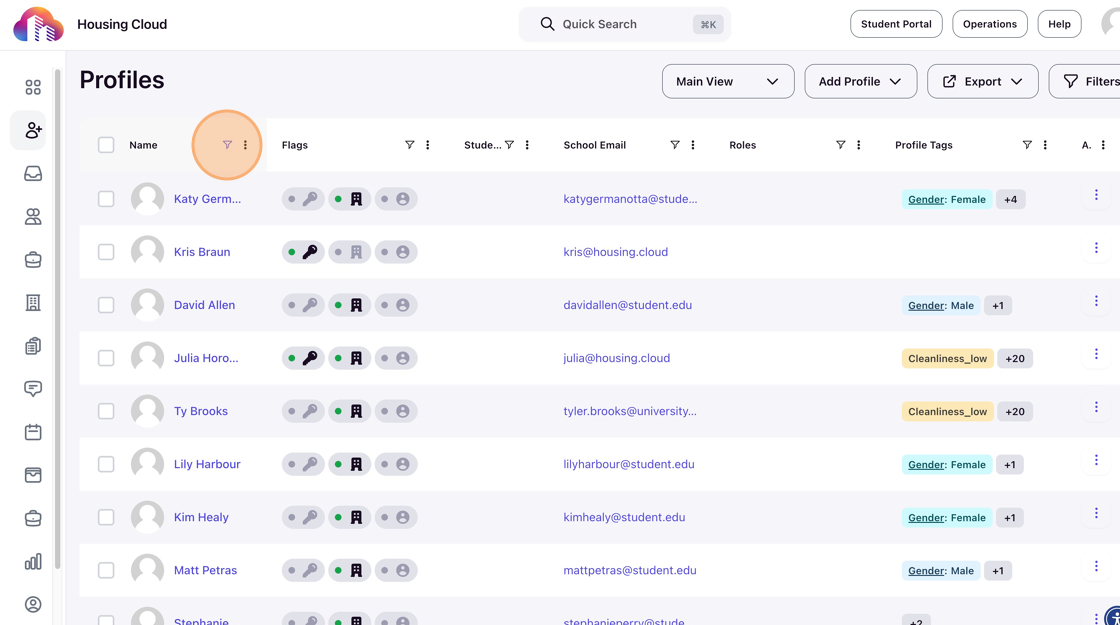
- Profiles—Every student who might apply for housing, whether they've applied yet or not
- Applications—Students who've submitted housing applications for a specific term (Fall 2024, Spring 2025, etc.)
- Residents—Students who have been assigned a room and have active or past housing assignments
- Student Staff—RAs, desk attendants, and other student employees who work for housing

Managing Housing Infrastructure
- Inventory — Your buildings, rooms, beds, furniture, keys, and condition reports
Tasks & Workflow
- Tasks — Track anything that needs follow-up: maintenance requests, student conduct issues, administrative to-dos, work orders, or any task that needs assignment and completion tracking
Communication & Operations
- Communications—Send emails and SMS, create broadcasts, post portal updates
- Finance—Track housing charges, payments, and outstanding balances
Reporting & Configuration
- Reports—Create custom reports and analytics dashboards
- Setup—Configure housing cycles, forms, rules, permissions, and all system settings
Your sidebar is customized to your role: What you see depends on your assigned permissions. Don't worry if your sidebar looks shorter than this list; that's normal and intentional.
Navigating Inventory and Setup
Two sections—Inventory and Setup—contain multiple subsections to help you get to specific areas quickly. When you click either of these sections, you'll see additional options appear.
Inventory Subsections
Click Inventory in the sidebar to access:
- Buildings—All residence halls and housing buildings
- Suites—Suite-level units across your buildings
- Rooms—All individual rooms across all buildings
- Beds—All individual beds across your entire inventory
- Furniture—All furniture items tracked in your system
- Room Parts—Components tracked for condition reports (walls, doors, windows)
- Keys—All keys in your key inventory system
- Room Condition Reports—All check-in and check-out condition reports

Jump straight to what you need: Instead of clicking through Buildings → Suites → Rooms, you can jump directly to the Rooms section if you know what you're looking for. This saves time when you need to find a specific room or bed without navigating through the full hierarchy.
Setup Subsections
Click Setup in the sidebar to access:
- Charge Codes—Billing rates and charge categories
- Roles & Permissions—Admin role definitions and permission settings
- Forms—Application forms, bio forms, task forms, and custom questionnaires
- Housing Cycles—All housing cycles (Fall 2024, Spring 2025, etc.)
- Rulesets—Automated roommate matching rules and assignment criteria
- Tags—All tag categories and tags used to label students, applications, and inventory
- System Configuration—Tenant-wide settings, branding, and global configurations
- Integrations—SIS integration settings, API configurations, third-party connections
- Profile Fields—Custom profile field definitions
- Document Templates—E-signature document templates (housing contracts, codes of conduct)
- Inventory Management—Building communities, furniture type definitions, inventory configuration
- Task Management—Task category definitions and workflow templates
- Meal Plans Management—Meal plan options and pricing configurations

Permission-restricted visibility: Not all admin users will see all Setup subsections. Your view depends on your assigned role and permissions. Super admins typically see all options, while other roles see only what they need. If you're missing subsections you need, contact your institution's Housing.Cloud super admin.
Permission-Based Visibility
The sidebar automatically adapts to show only the sections you have permission to access. This keeps the interface clean and prevents confusion about features you can't use.
Why you might see limited navigation: If you only see Dashboard and Profiles after logging in, your account likely doesn't have a role assigned. Being able to log in doesn't automatically grant you permissions—your profile must have a role that specifies what you can see and do.


Common Permission Patterns
Your sidebar adapts to match your role. Here are typical examples:
Basic Admin Access: You'll see Dashboard, Profiles, Residents, and Inventory—enough to view student information and check room assignments, but not make major configuration changes.
Application Manager: You'll see Applications, Profiles, and Residents, plus Setup sections for building application forms and configuring housing cycles—everything you need to manage the application process.
Operations Staff: You'll see Tasks, Inventory, Residents, and Communications—focused on day-to-day operations like handling maintenance requests, managing rooms, and communicating with residents.
Finance Manager: You'll see Finance, Residents, and Setup (specifically charge codes)—enough to track payments and configure billing without accessing unrelated areas.
Super Admin: You'll see everything, including Setup, Integrations, and Reports—full access to configure and manage all aspects of the system.
Missing sections you need? Contact your institution's Housing.Cloud super admin and request that they assign you an appropriate role. After the role is assigned, log out and log back in to see the updated navigation options.
How You'll Actually Use the Sidebar
The sidebar becomes second nature quickly. Here's how typical daily tasks flow through the navigation:
Finding a Student
Click Profiles → Search or filter for the student → Click their name to view details
You'll use this constantly—looking up students to check their application status, view their housing assignment, or update their information.

Reviewing Applications
Click Applications → Filter by status "Submitted" → Review and approve or deny
During application season, this becomes a daily workflow. The sidebar stays visible so you can jump between Applications and Profiles as you review student information.
Managing Room Assignments
Click Residents → Find the student → Click "Assign Bed" button
This is where you'll spend time during assignment season, moving between Residents and Inventory to check availability and make placements.

Configuring a Housing Cycle
Click Setup → Click Housing Cycles → Create or edit a cycle
You'll typically do this a few times per year when setting up new terms. Setup sections are grouped at the bottom of the sidebar since you use them less frequently than daily operations.
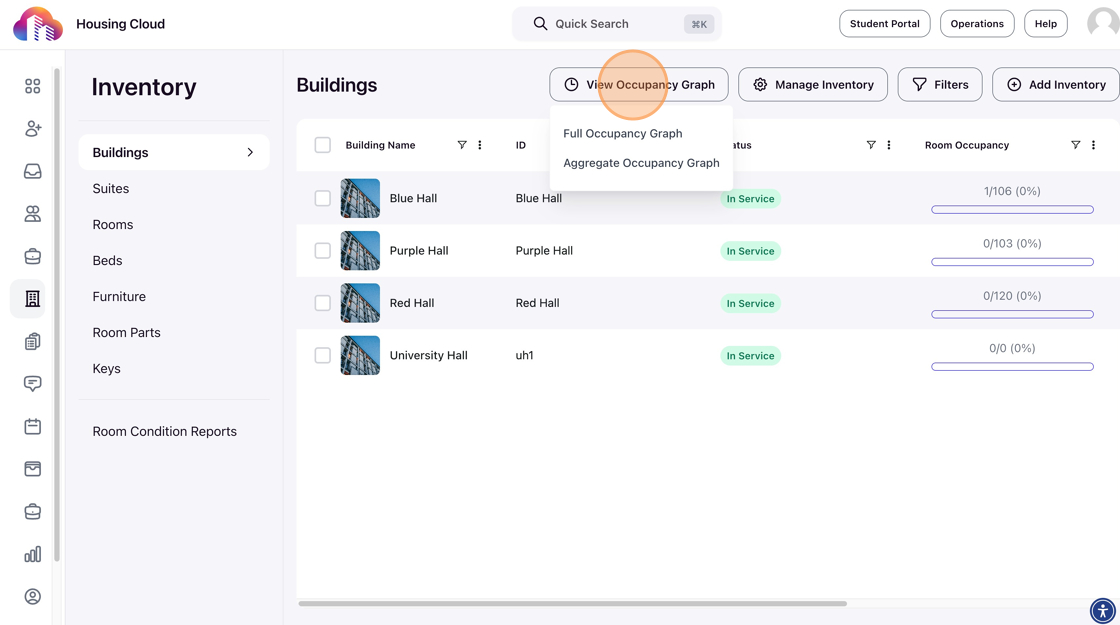
Viewing Building Occupancy
Click Inventory → Click Buildings → Click a building name → View occupancy graphs
Common when planning assignments or reporting occupancy rates to leadership. The Inventory subsections let you drill down from buildings all the way to individual beds.
Setting Up a New Housing Cycle (Multi-Section Workflow)
Click Setup → Click Housing Cycles → Create your new cycle → Click Forms to build your application → Click Tags to set up preferences → Click Rulesets to configure matching rules
Notice how you stay within Setup, moving between subsections as you complete related configuration tasks. The navigation keeps all your tools one click away.
Keyboard Shortcuts
Power users can navigate faster using keyboard shortcuts:
Cmd+K (Mac) or Ctrl+K (Windows): Open Quick Search to find students, rooms, or tasks without clicking through menus
Meta + 1-9 (if configured): Jump directly to specific sidebar sections
Speed tip: Once you learn Quick Search (Cmd/Ctrl+K), you can type section names to jump directly there. For example, press Cmd+K, type "forms," and hit Enter to go straight to Setup › Forms without clicking through the sidebar. Power users can navigate 2-3x faster using this technique instead of manual clicking.
Learn more about Quick Search shortcuts in PLS-1C: Quick Search.
Mobile Navigation
On mobile devices (phones and tablets), the sidebar becomes a collapsible menu to save screen space:
- Tap the hamburger menu icon (three horizontal lines) in the top-left corner
- The navigation drawer slides open from the left
- Tap any section to navigate
- The drawer automatically closes after selection
- Tap the hamburger icon again (or tap outside the drawer) to close it manually
The mobile navigation shows the same sections as desktop—your permissions determine what appears.
Understanding the Active Section Indicator
The currently-selected section is highlighted in the sidebar with a different background color or border. This visual indicator helps you quickly see where you are in the system.
When you navigate to a detail page (like viewing a specific student profile), the sidebar still highlights the parent section (Profiles) so you always know which functional area you're in.
Building Navigation Habits
As you use the system more, you'll develop shortcuts and habits:
- Scan the sidebar first: Before using Quick Search, quickly scan the sidebar—you might spot the section you need faster than typing
- Notice the grouping: People sections at the top, infrastructure in the middle, configuration at the bottom. This pattern helps you find things intuitively
- Remember Setup and Inventory have subsections: If you're looking for forms, cycles, or tags, they're all under Setup. If you're looking for rooms, beds, or keys, they're all under Inventory
- Use the active indicator: The highlighted section shows where you are—helpful when you've drilled deep into detail pages and need to orient yourself
Navigation becomes second nature: Within a week of daily use, you'll navigate without thinking about it. The consistent grouping and visual indicators make the sidebar intuitive—most users stop consulting documentation after just a few days of practice.
What's Next
Continue your Product Learning Session 1 journey:
- PLS-1C: Quick Search—Master the fastest way to navigate and find anything in the system
- PLS-1D: Working with Tables, Filters, and Bulk Actions—Learn the tools you'll use within each section to manage data effectively
- Complete PLS-1: Product Learning Session 1: System Navigation & Core Concepts